Friday, May 10, 2013

DIY: JUST MARRIED Banner


Another last minute DIY is our Just Married Sign. Sorry I dont have the picture of the step by step since I am already running out of time that moment. But here is the step by step process on how i did it.

1. Cut a piece of fabric, the shape is depends on what flag shape you wants.
2. Glued some decorative ribbon on top par of your flag
3. Use buttons to create the letters J-U-S-T_M-A-R-R-I-E-D and glued it to your flag shape fabric.
4. Then attached the flags to a string/yarn.
5. Your JUST MARRIED banner is now ready for action.


-♥♥♥-

Thursday, May 9, 2013

DIY: Flower Girls Headbands


One of my last minute DIY is this Headbands/Headdress for my little girls.

In creating the flowers you will need a fabric, a circle templates in 2-3 different sizes, scissor, candle, and a brads/embelishments. 

First cut a circles on fabric, 

then with your candle heat the edges of the fabric so it will curl-up slightly. 

Do these on all your circle fabrics. Then stack around 6 pieces of the circle fabrics, 2-3 piece on every size. Then add a crystal, pearl or any brads you have. 

Its time to create your headbands, you will need a simple headbands, the fabric flower you create, ribbons, fabric glue/glue gun and other additional decoration you think can be used.


I just wrap the ribbon to the plain headband then attached the fabric flowers, a silver ribbon and the string with stone & pearls that i bought from national bookstore.

And here's the final product.


My DIY Headband in action. =)


-♥♥♥-


DIY: Hanging Photo


Another DIY is a our picture display for the registration table. I just simply layout a polaroid style pictures of us and print it on a photo paper. I want to hang these pictures using a wooden clips but of course I dont want just a plain clips, and since I don't have time to do a DIY letter blocks to spell out our name, I thought the covered button with letters will be a perfect alternative. The step is just the same as my covered button for the pen holder. But this time I use stamp letters to achive a consitency in font style & size. 

1. Cut a piece of fabric, the size depends on your covered button size.
2. Stamp the letter using the stamp letter & stamp pad.
3. Then follow the instruction on the back of the carton of this covered buttons on how to attach the fabric on the button. Just make sure that your letter is on the middle part of the button.
4. Attached your finished covered button onto the wooden clips.
5. Do these on every letter to spell out your name/words.


6. Tie one end of the string/yarn into a bottle and the other end to another bottle to create something that will look like a clotheline.
7. Bring out your photos & time to clip it into your clotheline using your wooden
clips.

While clipping the photos on clothesline I suddenly realize that my name was too long and I cannot fit it all. So I decided to just use our nicknames "BRY♥MEI" 

My DIY Hanging Photo in action but because of the strong wind in the venue the pictures kept on flipping over.
-♥♥♥-


DIY: Guestbook Pen & Pen Holder


It's been 3 months already after our wedding, I thought I will not be busy anymore but because I got a lot of work to do, plus my family visit me here last month, and that honeyko & I are going to be a parent now, I become a little busy and almost forgot that I need to update my DIYs so I can share it with the soon to be Brides out there.

So here is our DIY Guestbook Pen. It is actually a permanent marker with a fine felt tip that can write in a glossy surface or even on glass, and it dries fast so no smudging compare to those gel pens that you need to wait to dries first when writes on glossy surface. I bought this from DAISO for 2 singdollar for 3 pens. At first my plan is to wrap a jute string around the pen beacause I saw this inspiration on the internet, but since I cannot find a nice jute string here and I think this look will be more on rustic style compare to a shabby chic style, I tried to think an alternative for a jute string and that is yarn, the good thing about the yarn is I can have the color that I want and I i think it is more comfortable for my guest to hold the pen since yarn is soft compare to a jute string.

Pen & Yarn from DAISO
Anyway let me tell you how I do it. You just need to do 2 somple steps:

1. Wrap the yarn around the pen, both the body & the cap. 
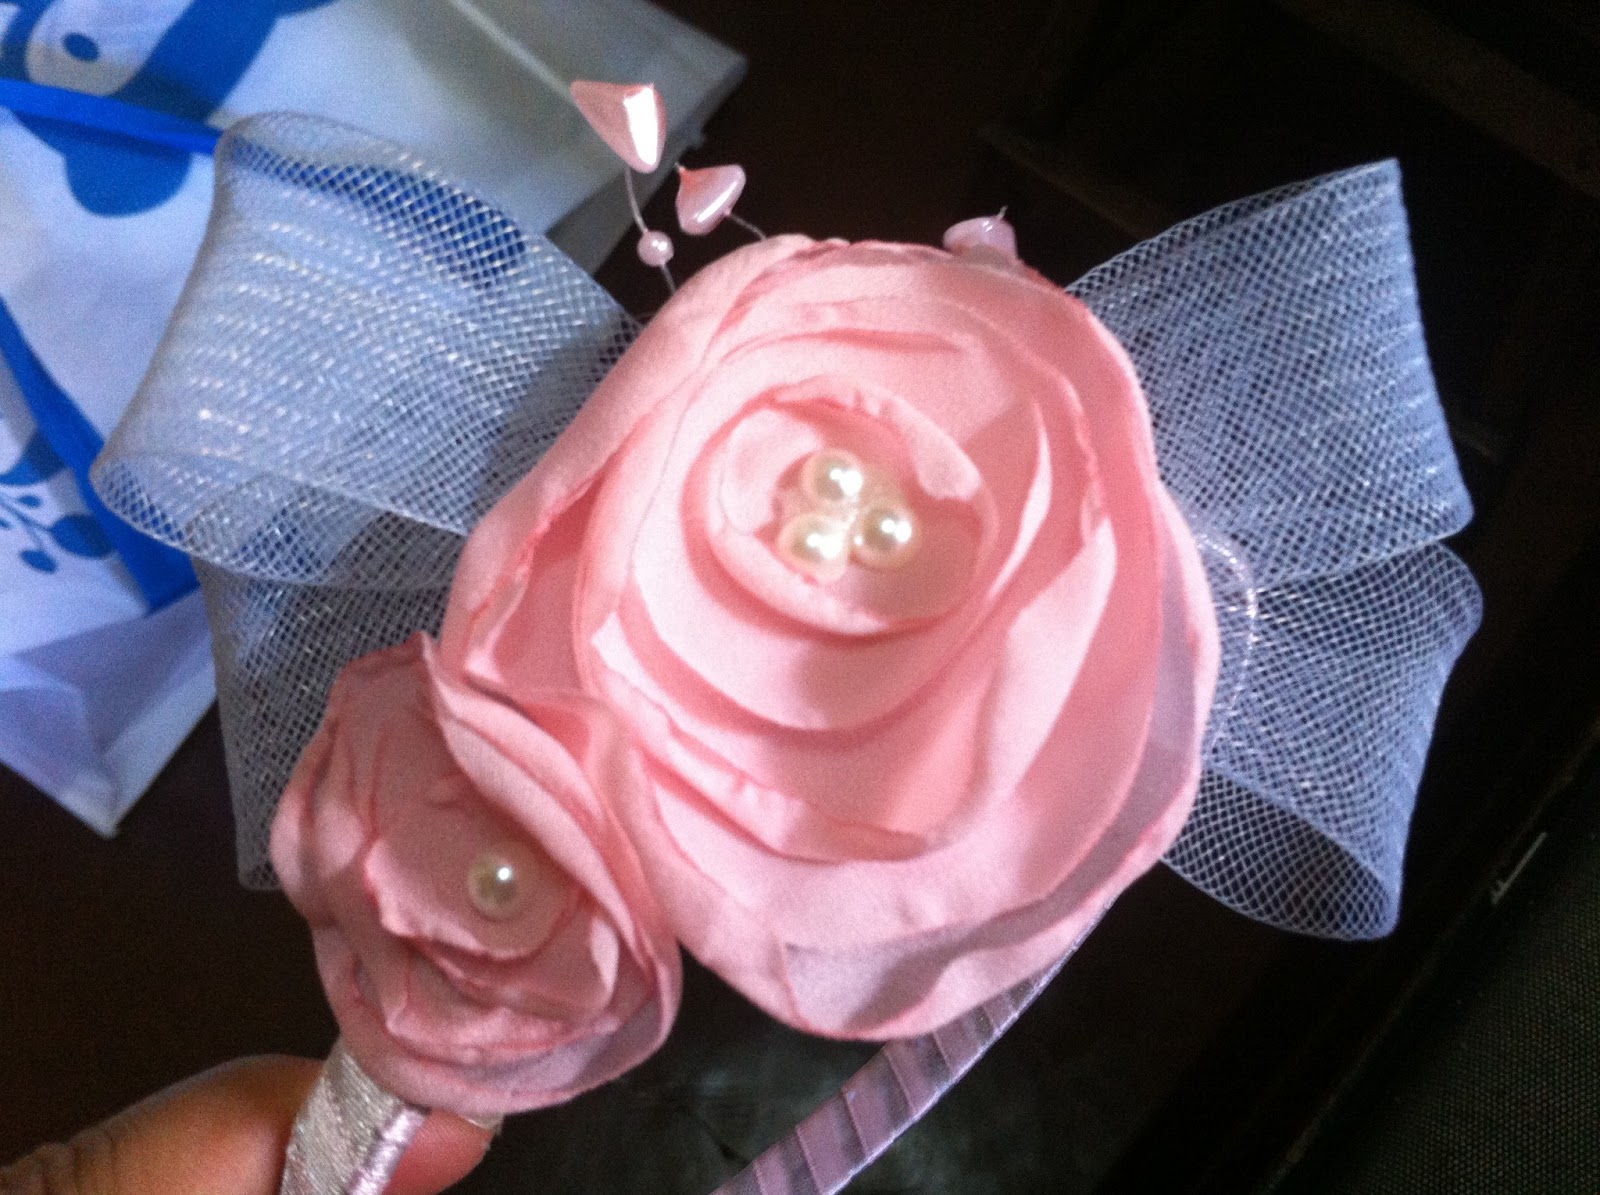
2. Then put a fabric flower on top end part of the pen. (the fabric flower I used is a scrapbooking embellishment which I collect, but if you don't have a pre-made one, just  google some tutorial on how to do a fabric flower.)

The Mummy Pen..haha..


Easy right? I think you can also Use some fresh flowers If you can't make the fabric one. 

Because I'm not happy that my pen will be just laying on the registration table so I also create a pen container. You need a small piece of burlap fabric or any fabric you want, a covered buttons, a permanent marker, a mason jar, string/yarn and a glue gun. Then follow these steps:

1. Cut a piece of fabric, the size depends on your covered button size.
2. Hand write the letter with a permanent marker.
3. Then follow the instruction on the back of the carton of the covered buttons on how to attach the fabric on the button. Just make sure that your letter is on the middle part of the button. 
4. Attached your finished covered button onto the string/yarn.
5. Tied it into the mason jar. You can put a little glue at the back of the buttons to secure it in place like what I did. 

The final product

By the way this is my inspiration.

And that's it. Hope you liked it. 
 -♥♥♥-